There are numerous ways to begin an order in ESP+. How would you like to create your order?
Convert Quote to Order
To create an order using the information from a quote, you can use the Convert to Order option in the Quotes section. To do this, open the project and click on Quotes.

Click on the quote number to open the details.

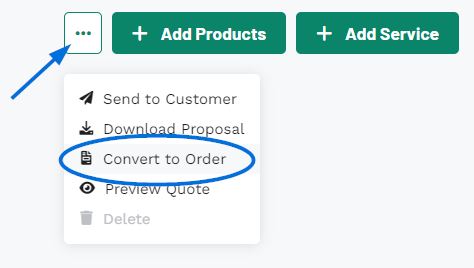
Then, use the three dot icon to select "Convert to Order".
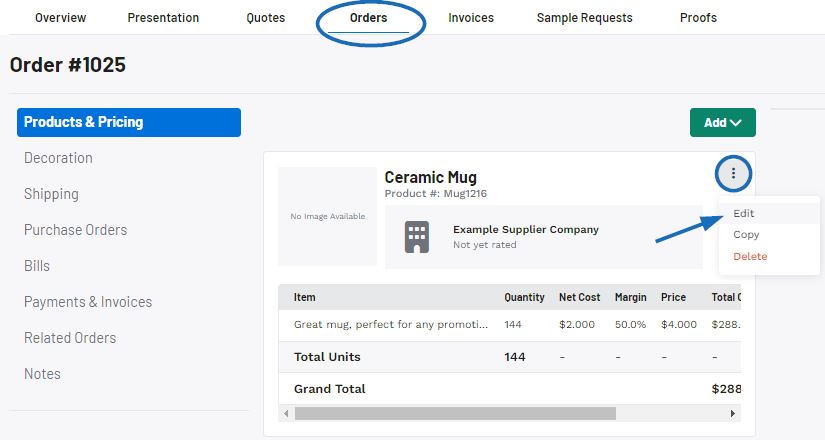
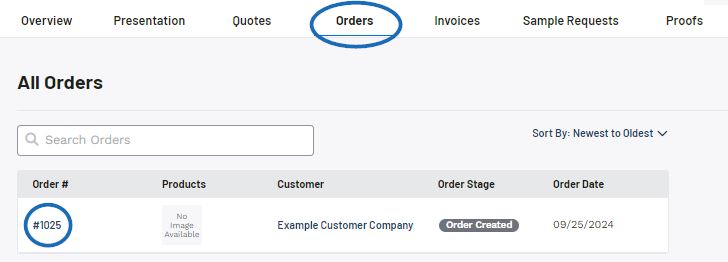
The newly created order will now be available in the Orders section of the Project and you can begin to configure the order information in the Products & Pricing section.
Create New Order from Project
Use the Project option from the main toolbar and select Projects.
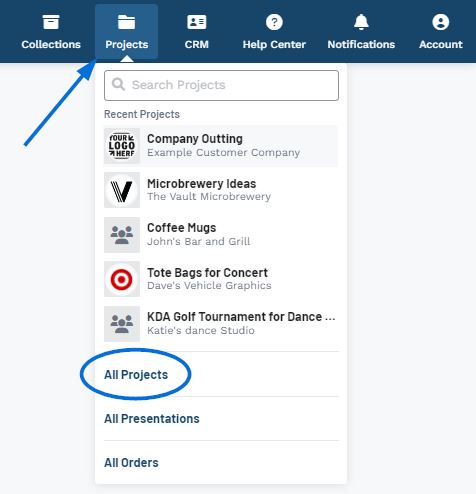
Click on the name of the Project for which you would like to create an order.

Then, click into the Orders section and click on the Create an Order button.

The Create a New Order for Project window will open.
Create Order from Search
With One Product
After locating the item you would like to order, click on the plus sign in the upper right corner of the product listing. Then, click on the Add to Order option.
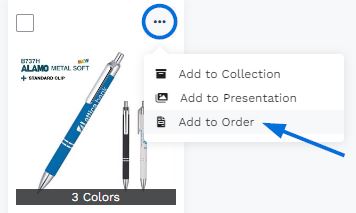
Then, click on the Create a New Order option. You will need to choose a project. Select an existing project by clicking on it or click on the Create a New Project option.
Once you've selected a project or created a new one, the Create a New Order for Project window will open.
With Multiple Products
To create an order with multiple products from a search, mark the products using the checkbox in the upper left corner of the product listing. A toolbar will appear at the bottom and you can click on the Add to Order button.
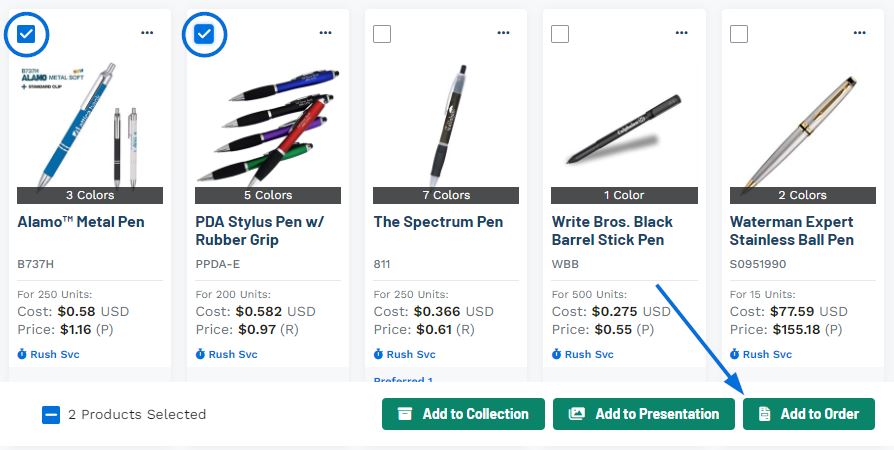
Then, click on the Create a New Order option. You will need to choose a project. Select an existing project by clicking on it or click on the Create a New Project option.
Once you have selected a project or created a new one, the Create a New Order for Project window will open.
Create Order from Collection
Click on Collections from the main toolbar and open the collection that contains the product(s) you would like to include in the order. The five most recently updated collections will be listed and you can click on the collection name to open it. If you do not see the collection you need, click on the All Collections link at the bottom.
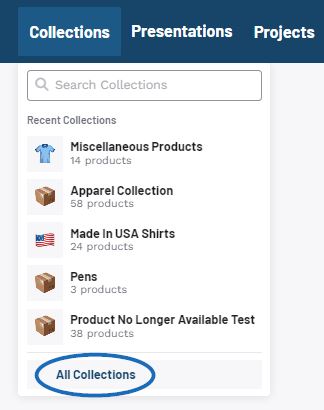
From within the collection, you can begin an order using one item, specific products, or add all items within the collection to a new order.
Use One Product
After locating the item you would like to order, click on the three dot icon in the upper right corner of the product listing. Then, click on the Add to Order option.

Then, click on the Create a New Order option. You will need to choose a project. Select an existing project by clicking on it or click on the Create a New Project option.
Once you've selected a project or created a new one, the Create a New Order for Project window will open.
Use Multiple Products
To create an order with multiple products from a collection, mark the products using the checkbox in the upper left corner of the product listing.
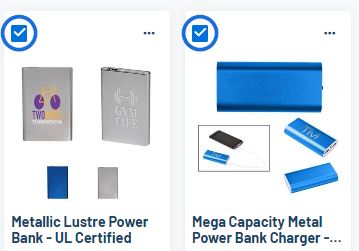
A toolbar will appear at the bottom and you can click on the Add to Order button.

Then, click on the Create a New Order option. You will need to choose a project. Select an existing project by clicking on it or click on the Create a New Project option.
Once you've selected a project or created a new one, the Create a New Order for Project window will open.
Use All Products
To create an order with all products from a collection, click on the Add button and select Add to Order.

Then, click on the Create a New Order option. You will need to choose a project. Select an existing project by clicking on it or click on the Create a New Project option.
Once you've selected a project or created a new one, the Create a New Order for Project window will open.
In the Create a New Order for Project window, there are three required fields: Order Date, Sales Person, and Order Contact. Use the calendar icon to select the Order Date. You will automatically be entered as the Sales Person and Order Contact, but you can click on the "X" to remove yourself and select another user in your company.
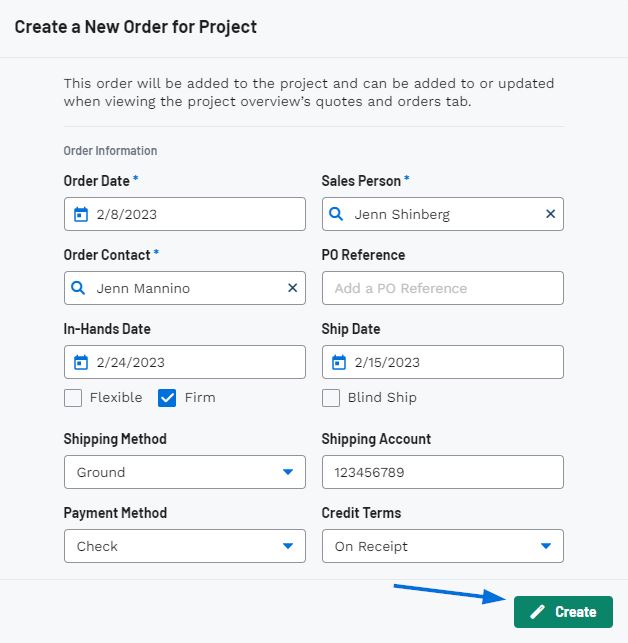
In addition to the three required fields, enter as much information as possible.
What do the Flexible and Firm checkboxes mean? (click for answer)
The two checkboxes below the In-Hands Date enable you to convey the strictness of that date. Checking Firm means that the order must meet the deadline set in the box above. Flexible indicates that there is some latitude or leeway with the In-Hands Date.
What is Blind Ship? (click for answer)
A Blind Ship is when the distributor requests that the order is sent directly from the vendor to customer without any of the vendor's information.
Once you have finished entering information, click on the Create button. When the order has been successfully created, you will see a notification in the lower right corner.

The newly created order will now be available in the Orders section of the Project and you can begin to configure the order information.
If there are multiple order documents available for this project, such as a quote and/or invoice, use the arrow to access additional documentation.


